Gear 101
What to rent, what to wear and what to check before your first ski day. Practical equipment advice for beginners and progressing piste skiers.
Premium kit is optional. Choose for fit, ability and conditions; the examples below explain particular choices, with links to the manufacturers.
Rent first. Buy with a reason.
Decide what belongs in your bag and what to collect in resort.
For a first trip, start with rental skis, boots and poles. You can learn what works for you without buying a full setup or transporting it. Check the package: a helmet may be an extra, and goggles and clothing should not be assumed to be included.
If you ski regularly, well-fitted boots may be the first purchase worth exploring with a bootfitter. Keep renting skis while you learn what terrain and handling you prefer. There is no universal number of ski days at which buying pays off.
| Item | Start here | Before you spend |
|---|---|---|
| Skis, boots and poles | Rent for a first trip. | Confirm the ability category, exchange arrangements and exactly what the package includes. |
| Helmet | Rent if an appropriate size and fit are available, or buy one that fits. | Try it with your goggles. Check the rental condition with staff; follow the maker’s inspection and replacement guidance. |
| Goggles, socks and gloves | Bring your own; borrow suitable clothing if it helps. | Fit, dryness and usable lenses matter more than matching brands. Confirm any hired clothing separately. |
| Your own ski setup | Consider it once your preferences are clearer. | Compare fitting, servicing, baggage, storage and rental costs using your actual plans. |
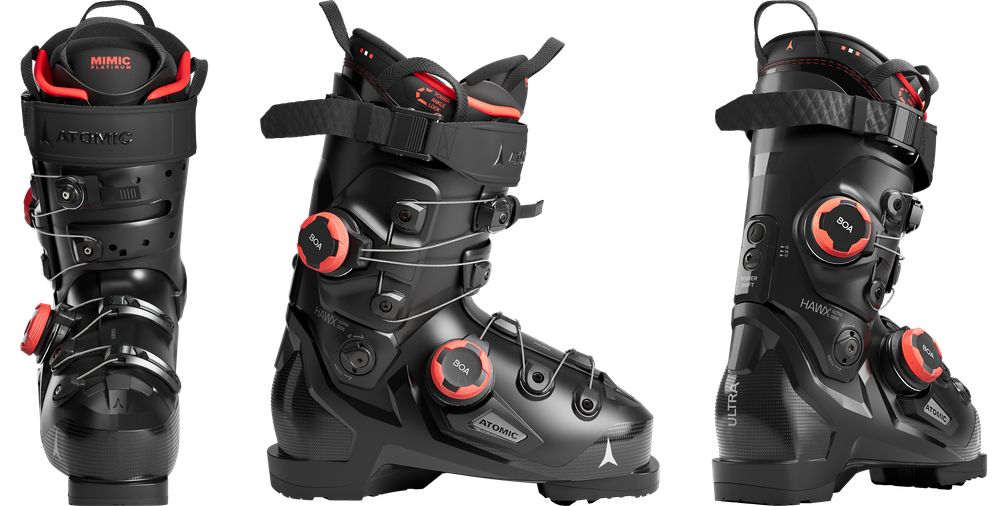
Boots: support without pain.
Give the fitting time, and speak up when something feels wrong.
Ski boots feel firmer than everyday shoes, but sharp pressure, numbness or crushing discomfort are reasons to stop and tell the fitter. Do not choose a larger boot simply to make room for thick socks or try to solve pain by overtightening the buckles.
Have both feet measured and try both boots with the ski socks you will wear. With the fitter’s guidance, stand and flex forward: your heel should stay held rather than lifting freely. Foot shape, liner and shell all matter; a shoe-size number alone does not settle the fit.
- Wear one smooth pair of ski socks. Keep trouser hems and base-layer cuffs out of the boot so fabric does not bunch.
- Tell the fitter about pressure points, loose heels or previous fit problems. Describe where you feel them rather than choosing a fix yourself.
- Ask how to fasten and release the boots, use any walking mode correctly and return for help. Recheck comfort before leaving the shop.
- If the fit is wrong on snow, return to the rental shop or bootfitter for an adjustment or exchange. Do not assume painful boots just need a full day to settle.
Premium examples to explore
Selected from manufacturer information. No hands-on testing.
Skis and poles: match the skier.
Useful questions beat a one-size-fits-all length chart.
Tell the shop your actual ability, height, weight and the terrain you expect to ski. A beginner learning on groomed pistes and an intermediate practising controlled turns may need different equipment from someone skiing deep snow. A higher-priced rental category is not automatically a better learning tool.
Length, width, stiffness and shape work together. Ask why the suggested ski suits your current skiing, and whether you can change it if it feels unmanageable. Let the technician check the boots, bindings and ski setup together; do not adjust binding settings yourself.
- For piste skiing, ask for an appropriate, manageable piste-oriented setup. Avoid buying from a height formula or waist-width number alone.
- Ask your school whether poles are needed for your first session. Some beginner classes start without them; your own instructor’s instructions decide.
- When poles are required, have the shop size them and the instructor explain their use.
Premium examples to explore
Selected from manufacturer information. No hands-on testing.

Premium piste ski
AtomicRedster Q9 Revoshock S + I 12 GW
A 75 mm-waisted piste ski with a multi-radius sidecut, designed for changing groomed-snow conditions.
Consider it for Advanced-to-expert skiers who enjoy carving short and longer turns on piste.
Before choosing Demo before buying. Ask a qualified shop to select the length and set up the binding for your boots and skiing.
© Atomic. Official press image.
View official product
All-mountain ski
AtomicMaverick 96 CTI
An approximately 96 mm-waisted ski with carbon-and-Titanal reinforcement, tip rocker and a shaped HRZN 3D tip.
Consider it for Confident skiers seeking a wider all-mountain option for mixed snow and some softer conditions.
Before choosing Compare it with a narrower ski if most of your week is on groomed pistes. Ski width does not make off-piste terrain safe.
© Atomic. Official press image.
View official product
Dress in layers you can change.
Keep moisture moving, add warmth, block wind and snow.
Build a system around the day’s forecast and how easily you feel cold. A jacket with insulation may need less underneath than an uninsulated shell. You should be able to adjust warmth as activity and weather change rather than relying on one bulky layer.
| Layer or item | What it does | What to check |
|---|---|---|
| Base layer | Moves moisture away from your skin. | Choose wool or synthetic fabric that fits comfortably. Avoid cotton next to the skin: it holds moisture. |
| Mid-layer | Adds insulation. | Fleece or an insulating layer works; choose warmth around the jacket and conditions, not a fixed layer count. |
| Jacket and snow trousers | Protect against wind and wet snow. | Look for waterproof, breathable outerwear with room to move and layers that fit beneath it. |
| Ski socks | Provide a smooth layer inside the boot. | One pair of long wool or synthetic ski socks. Avoid doubled socks, wrinkles and an overly bulky fit. |
| Gloves or mittens | Keep hands insulated and dry. | Waterproof, insulated and easy to move in. Pack a dry spare pair if you have one. |
| Neck warmer | Covers the neck and exposed gaps. | Choose a comfortable fit that does not interfere with the helmet, goggles or breathing. |
Premium examples to explore
Selected from manufacturer information. No hands-on testing.
Shell jacket · men’s cut
Norrønalofoten Gore-Tex Pro Jacket
A waterproof ski shell with underarm ventilation, a helmet-compatible hood and a removable powder skirt.
Consider it for Frequent skiers who want a technical outer layer they can adapt with separate insulation.
Before choosing The shell is uninsulated. Try it over your intended layers and check the hood, cuffs and room to move.
View official productInsulated midlayer · men’s cut
Arc’teryxProton Hoody
A fitted synthetic-insulation layer with an air-permeable face fabric and insulated hood.
Consider it for Active skiers who want breathable warmth beneath a weatherproof shell.
Before choosing Match insulation to temperature and how hot you run. Its weather-resistant face is not a replacement for a waterproof ski shell.
View official productMerino base layer · men’s cut
ORTOVOX185 Rock’n’Wool Long Sleeve
A regular-fit, 100% merino-wool long-sleeve top in a 185 g/m² fabric.
Consider it for Skiers who prefer a wool first layer for colder days.
Before choosing Try the wool against your skin and check the cut beneath your midlayer. Follow the garment’s washing instructions.
View official productInsulated gloves
HestraArmy Leather Heli Ski 5-finger
A long-cuff ski glove with a goat-leather palm, snow lock and removable liner.
Consider it for Skiers who want substantial warmth and a liner that can be removed for drying.
Before choosing Hestra lists this version as not waterproof. Compare a membrane-equipped option for wet conditions and check finger room and pole grip.
View official product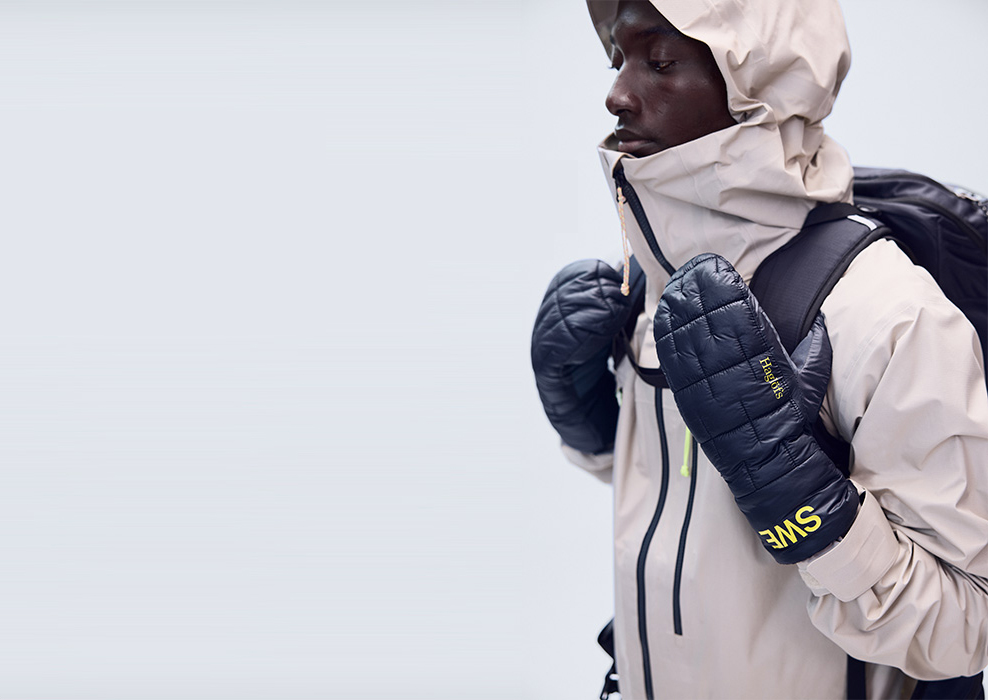
Lightweight packable mitten
HaglöfsTeam SWE Mitten
A lightweight, packable mitten with recycled synthetic insulation, soft fleece lining, elastic cuffs and wrist straps.
Consider it for Someone wanting compact extra hand warmth for cold winter days and breaks.
Before choosing Check pole grip, finger dexterity and weather protection before choosing it for a full ski day. The official page does not claim a waterproof membrane. A mitten is not a like-for-like substitute for a five-finger ski glove.
© Haglöfs. Official press image.
View official product
Try helmet and goggles together.
Fit and visibility matter more than a matching set.
Choose a snow-sports helmet that sits level and stays stable without pinching or wobbling. It should cover the forehead without blocking your view. Follow its fitting instructions and check the chin strap with rental staff. A helmet reduces some risks; it does not make every fall safe.
Try your actual goggles with the helmet. The foam should sit comfortably around your face without the helmet pushing the frame onto your nose. Check your field of view and that you can breathe comfortably. If you wear glasses, try an over-the-glasses design with your own pair.
- Choose the lens for the light. VLT means visible-light transmission: a higher percentage lets more light through for darker conditions; a lower percentage suits brighter sun.
- Check the maker’s stated UVA/UVB protection separately from tint darkness. Lens colour alone is not a reliable buying rule.
- Ask how the lens performs in the weather you expect and whether an alternative low-light lens is included or costs extra. No lens makes poor visibility disappear.
- Keep vents clear and follow the maker’s cleaning instructions. Carry the protective pouch so the lens is not loose against keys or other hard items.
Premium examples to explore
Selected from manufacturer information. No hands-on testing.
A small, useful packing list.
Pack for fitting as well as for skiing.
Put ski socks and goggles where you can reach them at collection. Your booking confirmation should say which hard equipment is supplied; pack or arrange the rest before you travel.
- Wear on the mountain: base layers, adjustable insulation, ski jacket, snow trousers, one pair of ski socks, gloves or mittens and a neck warmer.
- Have ready: goggles, a helmet if not hired, and any spare lens or dry gloves you have chosen.
- For the day: sun protection and lip balm, water, a snack, your phone and the lesson meeting instructions. Keep any personal medication you need accessible.
- Away from skiing: warm shoes with useful grip, dry clothes and something comfortable for the accommodation.
- Booking details: equipment contents, fitting location and hours, exchange contact, lesson time and meeting point, and the equipment return deadline.
Collect the kit before the lesson clock starts.
A calm fitting is part of the first morning’s plan.
Ask whether you can collect and fit equipment on arrival evening, and whether that changes the price or rental period. If that is not possible, work backwards from the lesson time using the shop’s fitting guidance and the journey to the actual meeting point. Do not assume a fixed 15-minute stop will be enough.
- Before travelling: confirm the exact shop or fitting address, opening window, reservation contents, exchange terms and return deadline.
- At the shop: share accurate skier information, try both boots carefully, then have the technician prepare the skis and check the complete setup.
- Before leaving: try helmet and goggles together, check any required poles, and ask where to get help if the fit is uncomfortable.
- Before the lesson: use the meeting point on your confirmation, have your fitted equipment ready and bring only the poles or other kit your school requested.
- At the end of the stay: leave time to return equipment, change and collect bags before the transfer. Check the return instructions rather than assuming accommodation pickup.
Off-piste: what you need before you go.
Personal rescue kit, practised skills and a plan for the actual day.
Leaving marked, open pistes is a separate mountain decision, even when a lift gets you there. Prepare with qualified local guidance. Owning specialist equipment does not make a route suitable or safe.
Essential for every person
- Avalanche transceiver (DVA): a three-antenna model, worn and switched on as its manufacturer directs. Check batteries, service status and any recalls before the trip.
- Avalanche probe + metal-bladed shovel: each person carries both in an accessible backpack. A shared set is not enough.
- Protection and spare warmth: a well-fitting ski helmet, goggles/sunglasses, sun protection, weather-appropriate layers, waterproof shell, warm gloves and a spare insulating layer.
- A charged phone, food and drink: save rescue contacts and know how to share your location. Bring a power bank and cable; phone coverage is not guaranteed.
Skills and checks before leaving the piste
- Learn and practise: take avalanche-awareness and companion-rescue training. Practise transceiver search, probing and digging with the actual kit you will use.
- Check the whole group: everyone must be equipped and able to help. Perform a transceiver group check at the start of every outing and confirm every device is in transmit mode. Follow manufacturer guidance on batteries, carrying position and interference from phones/electronics.
- Make a day-specific plan: read the latest Météo-France avalanche bulletin for the relevant massif, including avalanche problems, affected aspects/elevations and changes through the day, plus the mountain weather. Check local advice and closures. Match terrain and objectives to the whole group, agree alternatives and turnaround decisions, and reassess as conditions change. The danger number alone is not a go-ahead.
- Go with the right people: do not go alone. If the group cannot assess avalanche terrain and conditions, choose a qualified local mountain guide. Tell someone your plan and expected return.
Pack for a delay or an emergency
- Group emergency kit: first-aid kit, emergency insulation/shelter, headtorch, whistle and a small repair kit. Agree who carries what; practise the relevant skills.
- Navigation and communication: offline mapping plus a suitable backup you can use. Ask your guide whether the itinerary needs a satellite communicator or other equipment beyond mobile coverage.
- Rescue and cover: verify that your insurance covers the planned off-piste activity, rescue and repatriation, including any guide or terrain restrictions. In an emergency, call 112. For an accident on the Val d’Isère ski area, the piste rescue service is +33 4 79 06 02 10. Save both numbers and be ready to give your precise location.
Extra equipment depends on the outing
- Avalanche airbag: an additional safety measure to discuss with your guide. Learn its fit, checks and deployment. Burial remains possible even when it deploys correctly. It does not replace a transceiver, probe, shovel, training or sound decisions.
- Touring, glacier or technical terrain: skins and touring equipment, or a harness, rope, crampons and crevasse-rescue equipment, may be needed. Have a qualified guide specify the kit and training for the actual itinerary. Do not treat these as a universal shopping list.
Premium examples to explore
Selected from manufacturer information. No hands-on testing.
These examples are only part of an off-piste kit. Use the preparation checklist above and have a qualified guide specify the equipment for your outing. Practised rescue skills and sound decisions remain essential.
How we write about gear
Original educational guidance informed by the sources below. Personal fit and warmth vary; this is not an individual equipment fitting. No hands-on product testing was carried out for this guide.
Karl Goggles is an affiliate partner. Its feature is promotional; it is not a tested product review. The current link is the brand’s ordinary product link.
Editorial details and useful reading
Category guides explain the trade-offs. Comparisons must state their evidence; a tested review must say who tested the equipment, how it was obtained, the time and conditions, the method and the limitations. Commercial relationships are labelled where they appear.
- Val d’Isère equipment rentalLocal rental-package scope; confirm inclusions and eligibility in your own booking.
- Beginner equipment and clothingRental-first guidance, ski socks and clothing basics.
- Understanding ski-boot fitFoot measurement, heel hold and professional fitting.
- Choosing a type of skiAbility, terrain and the factors behind ski selection.
- Dressing for skiingLayering, insulation and weather protection.
- Choosing ski gogglesGoggle fit, glasses compatibility and lens transmission.
- Snow-helmet fit questionsHelmet fit and helmet/goggle compatibility.
- UV protection and lens tintUV filtering is separate from how dark a lens looks.
- Adult ski lessons in Val d’IsèreAn example of school-specific pole instructions for a first lesson.
- Val d’Isère chalet fittingOne local arrival-evening fitting and exchange service; availability is provider-specific.
- Karl Straightliner Black specificationsManufacturer specifications for the labelled affiliate partner feature, not an independent product test.
- Avalanche rescue equipment and trainingThree-antenna transceivers, probes, metal shovels and regular practice.
- Avalanche-awareness and companion-rescue trainingField-based learning for terrain decisions and companion rescue.
- Val d’Isère off-piste safetyLocal preparation, personal equipment, group checks and emergency packing.
- Understanding the avalanche bulletinRead the full bulletin and assess local conditions; the danger number alone is insufficient.
- Avalanche equipment and airbag limitationsEach-person rescue equipment, communications and the limits of airbags.
- Avalanche preparation and reassessmentPractised equipment, emergency shelter, navigation, alternatives and changing plans.
- Winter navigation and phone preparationOffline topographic maps, backup navigation, power bank and cable.
- Val d’Isère emergency and piste-rescue contacts112 for emergencies; the separate piste service number is for accidents on the Val d’Isère ski area.
- Ski rescue and insurance informationCheck the coverage and exclusions of your own policy for the planned activity.
- Bureau des Guides de Val d’IsèreOfficial local mountain-guide contact for itinerary and equipment assessment.
- Glacier travel equipment and skillsSpecialist equipment and training for glacier travel; not a universal off-piste kit list.
- Météo-FranceOpen the latest bulletin for the relevant massif before each outing.
- Atomic Hawx Ultra 130 S Dual BOA product informationManufacturer specifications for a source-informed premium example. Suitability is editorial interpretation; no hands-on test.
- Atomic Redster Q9 Revoshock S + I 12 GW product informationManufacturer specifications for a source-informed premium example. Suitability is editorial interpretation; no hands-on test.
- Atomic Maverick 96 CTI product informationManufacturer specifications for a source-informed premium example. Suitability is editorial interpretation; no hands-on test.
- Norrøna lofoten Gore-Tex Pro Jacket product informationManufacturer specifications for a source-informed premium example. Suitability is editorial interpretation; no hands-on test.
- Arc’teryx Proton Hoody product informationManufacturer specifications for a source-informed premium example. Suitability is editorial interpretation; no hands-on test.
- ORTOVOX 185 Rock’n’Wool Long Sleeve product informationManufacturer specifications for a source-informed premium example. Suitability is editorial interpretation; no hands-on test.
- Hestra Army Leather Heli Ski 5-finger product informationManufacturer specifications for a source-informed premium example. Suitability is editorial interpretation; no hands-on test.
- POC Obex Mips product informationManufacturer specifications for a source-informed premium example. Suitability is editorial interpretation; no hands-on test.
- ORTOVOX Rescue Set Diract Voice product informationManufacturer specifications for a source-informed premium example. Suitability is editorial interpretation; no hands-on test.
- ORTOVOX avalanche transceiver support and software updatesCheck the current manufacturer guidance for the featured Diract Voice transceiver; no evergreen software-version or no-recall claim is made.
- Haglöfs Team SWE Mitten product informationManufacturer specifications for a lightweight, packable mitten example. Optional compact warmth is a different use case from a five-finger ski glove; no waterproof membrane claim or hands-on test.